Melon Editor is a powerful tool for game development, allowing developers to fine-tune various aspects of their game objects. One important feature in Melon Editor is the ability to set gravity for game objects. This functionality can be crucial for creating realistic physics in your game. In this guide, we will walk you through the process of configuring gravity for a game object using Melon Editor, ensuring that your object behaves as expected under gravitational forces.
Has Body of Object
When you opening game object and give the settings like this picture
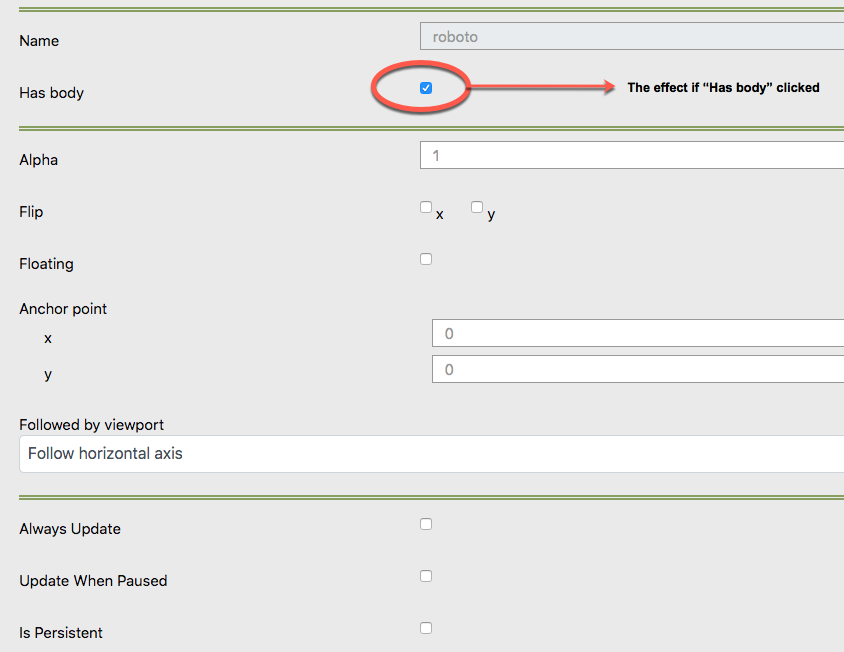
Then The object that you give body will have gravity and fall as shown in the picture bellow.
1. Opening Your Game Object
The first step in configuring gravity is to open the game object you wish to modify in Melon Editor. Follow these steps to access and edit the properties of your object:
- Launch Melon Editor: Start by opening Melon Editor from your development environment.
- Load Your Project: Ensure your project is loaded. Navigate to the scene or workspace where your game object is located.
- Select Your Game Object: Click on the game object that you want to apply gravity to. This action will bring up the object’s settings and properties.
2. Accessing the Object’s Settings
Once you have selected the game object, you need to access its settings to enable gravity. Here’s how to do it:
- Open Object Settings: Right-click on the game object and select “Properties” or use the property editor panel if it’s already visible.
- Navigate to Physics Properties: Look for a section labeled “Physics” or similar. This section is where you can configure various physical properties of your object, including gravity.
3. Enabling the Body Component
To make your game object respond to gravity, you must ensure that it has a physics body component. Follow these steps to enable the body component:
- Check for Body Component: In the physics properties section, look for an option related to the “Body” or “Physics Body.”
- Add or Enable Body Component: If the body component is not already present, add it by selecting the appropriate option (e.g., “Add Body” or “Enable Body”). This component allows the object to interact with physical forces such as gravity.
4. Configuring Gravity
With the body component enabled, you can now set up gravity for your game object. Here’s how:
- Locate Gravity Settings: Find the gravity settings within the physics properties. This might be labeled as “Gravity Scale,” “Gravity Force,” or something similar.
- Adjust Gravity Settings: Set the desired gravity values. You can typically adjust the gravity scale to increase or decrease the effect of gravity on the object. A value of 1.0 usually represents standard gravity, while values greater or less than 1.0 will increase or decrease the gravitational pull respectively.
5. Previewing the Effect
After configuring gravity, it’s essential to test and preview how the object behaves:
- Run the Scene: Click the play or run button to see the changes in action.
- Observe Object Behavior: Watch how the game object falls or interacts with other elements in the scene. Ensure that the object responds to gravity as intended.
- Adjust Settings if Necessary: If the object does not behave as expected, return to the physics properties and adjust the gravity settings until the behavior matches your requirements.
6. Saving Your Changes
Once you are satisfied with the gravity settings, make sure to save your changes:
- Save the Scene: Click “Save” or use the save shortcut to ensure that your adjustments are not lost.
- Update Project Files: If needed, update your project files to include the latest changes.
Example: Gravity in Action
To illustrate, let’s consider a simple example. Suppose you have a game object, such as a ball, that you want to fall under the influence of gravity. After enabling the body component and setting the gravity scale to 1.0, the ball will fall as shown in the following picture:
In this example, the ball’s response to gravity is clearly visible, demonstrating how the object accelerates downward due to the gravitational force.
Conclusion
Configuring gravity in Melon Editor involves a few straightforward steps: opening your game object, enabling the physics body component, adjusting gravity settings, and previewing the changes. By following this guide, you can ensure that your game objects respond realistically to gravitational forces, enhancing the overall physics and gameplay experience. Remember to save your changes and test thoroughly to achieve the best results for your game.